Dairy-Free, Gluten-Free Vegan Peanut Butter Pie: Your Perfect Dessert
Imagine the irresistible taste of a classic chocolate peanut butter cup, transformed into a luxurious, creamy, and utterly decadent pie. Now, imagine that pie is entirely plant-based, dairy-free, gluten-free, and requires absolutely no baking whatsoever. Sound too good to be true? Welcome to the world of the **no bake peanut butter cup pie vegan** – a dessert so easy to make, so universally loved, and so delightfully indulgent, it’s set to become your new favorite. This isn't just a dessert; it's a culinary revelation that proves you don't need dairy, gluten, or eggs to create something truly spectacular. This pie is a game-changer for anyone navigating dietary restrictions, or simply looking for a healthier, yet still utterly satisfying, treat. Its straightforward assembly, minimal ingredient list, and incredible flavor profile make it an instant hit for any occasion, from casual family dinners to festive holiday gatherings. The hardest part, as many attest, is simply waiting for it to firm up in the freezer! Let's dive into what makes this particular vegan peanut butter pie so exceptional and how you can master it in your own kitchen. No-Bake Vegan Peanut Butter Pie: Easy Chocolate Peanut Butter Cup TasteWhy This Vegan Peanut Butter Pie is Your New Go-To Dessert
The appeal of a **no bake peanut butter cup pie vegan** extends far beyond its delicious taste. It offers a multitude of benefits that make it a standout choice for any dessert spread:- Effortless Elegance (No-Bake Magic): Forget turning on the oven! This pie comes together with simple mixing and chilling. This makes it perfect for hot summer days, busy holidays when oven space is precious, or for beginner bakers who want impressive results without complex techniques.
- Dietary Inclusivity: It’s a dream come true for those with allergies or specific dietary choices. Being dairy-free, gluten-free, soy-free, and egg-free means almost everyone at your table can enjoy a slice without worry. It's truly a dessert for all.
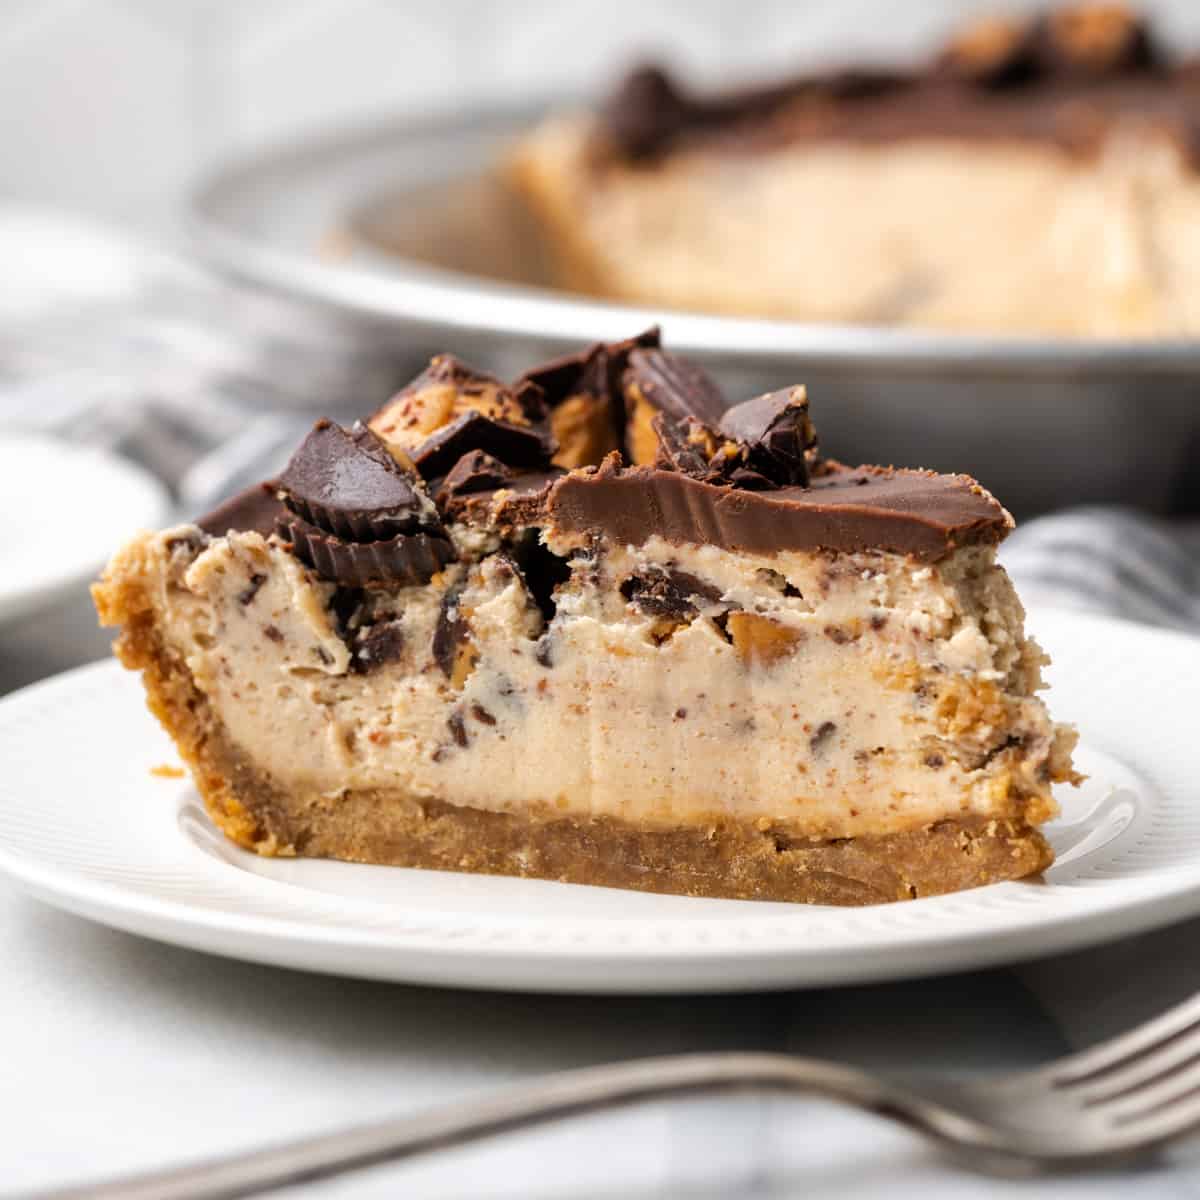
- Rich & Creamy Indulgence: Despite its healthy credentials, this pie doesn't skimp on flavor or texture. Each bite is a symphony of rich chocolate and velvety peanut butter, reminiscent of your favorite candy bar. The filling is luxuriously smooth, and the crust offers a delightful textural contrast.
- Simple, Wholesome Ingredients: You won't find a long list of obscure additives here. The recipe relies on natural, accessible ingredients like peanut butter, coconut oil, maple syrup, and almond flour, making it a "cleaner" dessert option.
- Make-Ahead Marvel: This pie actually *needs* to chill, making it the ultimate make-ahead dessert. Prepare it a day or two in advance, store it in the freezer, and simply pull it out shortly before serving. Less stress on the day of your event!
The Magic Behind the Layers: Key Ingredients and Their Secrets
The beauty of this **no bake peanut butter cup pie vegan** lies in its minimalist yet mighty ingredient list. Each component plays a crucial role in achieving that perfect texture and flavor. You'll be amazed at how such simple ingredients can combine to create such an extraordinary dessert.1. The Robust Chocolate Crust
- Almond Flour: This provides the gluten-free base for our rich chocolate crust. It's naturally high in protein and healthy fats, lending a tender texture. For an alternative, you could experiment with finely ground gluten-free graham crackers or even crushed gluten-free chocolate cookies for a slightly different flavor profile.
- Cacao Powder: Unsweetened cacao powder is essential for that deep, dark chocolate flavor. It also boasts antioxidant benefits, adding a subtle health boost. Ensure it's unsweetened to control the sugar content of the pie.
- Maple Syrup & Coconut Oil: These two bind the crust together, provide sweetness, and help it firm up when chilled. The coconut oil acts as a solidifying agent, ensuring a sturdy crust without any baking.
- A Pinch of Salt: Don't skip the salt! It enhances the chocolate flavor and balances the sweetness.
2. The Velvety Peanut Butter Filling
- Creamy Peanut Butter: Opt for natural, unsweetened peanut butter with minimal ingredients (just peanuts and salt, ideally). The quality of your peanut butter will significantly impact the flavor of your pie. Ensure it's creamy, not chunky, for the smoothest possible filling.
- Maple Syrup: This provides natural sweetness and a lovely depth of flavor to the filling. You can adjust the amount to your preference. Agave nectar can be a substitute, but maple syrup offers a unique, rich taste.
- Coconut Oil (Refined is Key!): This is the unsung hero of the pie. When chilled, coconut oil becomes solid, giving the filling its firm, sliceable texture. *Here's a crucial tip:* If you want your pie to taste purely of peanut butter and chocolate, choose *refined* (or expeller-pressed) coconut oil. Unrefined coconut oil has a distinct coconut flavor, which some might enjoy, but refined coconut oil is completely neutral, allowing the other flavors to shine through.
- Water & Salt: A little water helps achieve the perfect consistency for blending, and salt, once again, balances the flavors, making the peanut butter taste even richer.
3. The Silky Chocolate Topping
- Cacao Powder, Maple Syrup, & Melted Coconut Oil: These three ingredients come together to create a simple yet elegant chocolate drizzle. The melted coconut oil ensures a smooth, pourable consistency that sets beautifully when cold, forming a delicate shell that cracks delightfully when sliced.
Mastering the Art of the No-Bake Method: Step-by-Step Perfection
The true genius of this **no bake peanut butter cup pie vegan** lies in its assembly process. It’s a series of simple steps, but paying attention to a few key details will guarantee a flawless result.Step 1: Prep Your Ingredients & Pan
Before you begin, ensure all your ingredients, especially the maple syrup, peanut butter, and coconut oil (if it solidified), are at room temperature. This is absolutely critical! Cold ingredients will make mixing difficult and prevent your pie from achieving that desired silky-smooth texture. If your maple syrup is in the fridge, measure it out an hour before you start. For your pan, an 8-inch pie pan or springform pan works best. Line it with parchment paper for easy removal later – this is a lifesaver!
Step 2: Craft the Chocolate Crust
In a medium bowl, combine the almond flour, cacao powder, maple syrup, melted coconut oil, and a pinch of salt. Stir vigorously until everything is well combined and the mixture starts to stick together. You should be able to press it into a cohesive ball. Press this chocolate mixture evenly into the bottom of your prepared pan. Use the back of a spoon or your fingers to create a firm, flat base. Pop the crust into the freezer while you prepare the filling; this helps it set quickly.
Step 3: Create the Dreamy Peanut Butter Filling
This is where the magic happens for that irresistible texture. Add the room-temperature peanut butter, maple syrup, melted coconut oil, a touch of water, and salt into a high-speed blender. Blend until the mixture is incredibly smooth and silky. Resist the urge to just whisk it – a blender truly makes a remarkable difference, eliminating any graininess and creating a uniformly luxurious filling. Pour this smooth filling over your chilled chocolate crust, ensuring it’s spread evenly. Return the pan to the freezer, making sure it’s on a flat surface to allow the pie to set evenly. For more tips on achieving this perfect texture, check out our guide: Achieve Silky Smooth No-Bake Vegan Peanut Butter Pie Every Time
Step 4: The Silky Chocolate Topping & Finishing Touches
For the chocolate topping, you have a couple of options. You can prepare it immediately after pouring the peanut butter filling and gently swirl it into the still-soft peanut butter layer for a marbled effect. Alternatively, you can wait until the peanut butter layer is completely frozen, then add the chocolate topping as a distinct, firm layer. Both are beautiful! To make it, combine melted coconut oil, cacao powder, and maple syrup in a bowl. Whisk until it's perfectly smooth and glossy. Drizzle this rich chocolate topping over your pie. For decoration, consider scattering a few crushed peanuts for added crunch and visual appeal. A sprinkle of sea salt flakes can also elevate the flavors beautifully.
Serving, Storing, and Customizing Your Plant-Based Masterpiece
Once assembled, your **no bake peanut butter cup pie vegan** requires a minimum of 2-3 hours in the freezer to set completely. For the best texture and easiest slicing, store the pie in the freezer until about 10 to 15 minutes before you plan to serve it. This short period at room temperature allows it to soften slightly, making it perfectly creamy but still firm enough to hold its shape. If left out for too long, the coconut oil will begin to melt, and the pie will become too soft.Customization Ideas:
- Crunchy Crust: Instead of plain almond flour, mix in some finely chopped vegan chocolate or roasted peanuts into the crust mixture.
- Nut Butter Variations: While peanut butter is classic, feel free to experiment with almond butter or cashew butter for a different flavor profile. Just ensure they are creamy and natural.
- Extra Toppings: Beyond crushed peanuts, consider shaved vegan chocolate, a dusting of cacao powder, fresh berries (raspberries and strawberries pair wonderfully with chocolate and peanut butter), or even a dollop of vegan whipped cream.
- Mini Pies: For individual servings, press the crust into muffin tins lined with paper cups and follow the same layering process.
